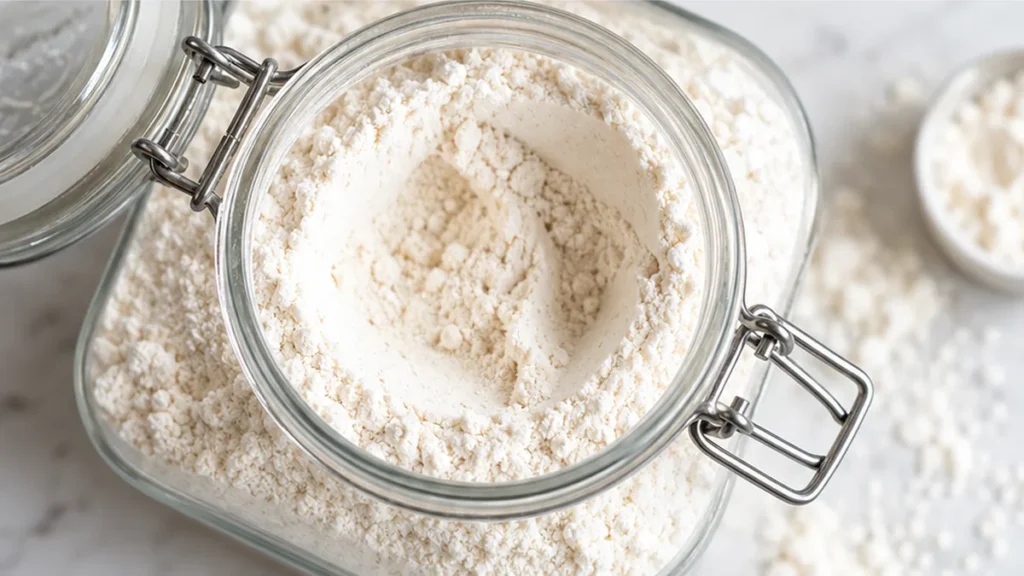
This homemade gluten free flour blend combines various flours for optimal baking. It’s easy to make and perfect for gluten-free recipes.
Key takeaways
- Selecting the right ratios of starch, protein, and fiber is crucial for a balanced blend.
- Common issues like grit or density can be fixed with proper milling and ingredient adjustments.
- Substitutions can alter texture and flavor; always consider moisture adjustments.
- Homemade blends offer versatility and customization for various dietary needs.
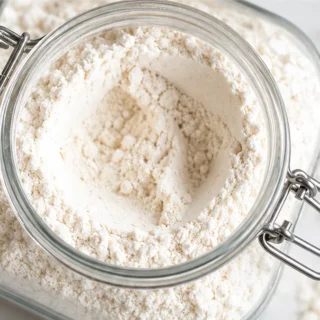
Homemade Gluten-Free Flour Blend Recipe
Ingredients
- 2 cups (290g) white rice flour
- 1 cup (115g) tapioca flour
- 1 cup (120g) potato starch
- 1 cup (120g) millet flour
- 2 teaspoons xanthan gum (optional)
- 1/2 cup (60g) sorghum flour
Instructions
- In a large zipper storage bag or a spacious bowl, combine the 2 cups of white rice flour, 1 cup of tapioca flour, 1 cup of potato starch, and 1 cup of millet flour. If using, add 2 teaspoons of xanthan gum.
- Seal the bag or cover the bowl tightly and shake vigorously for 1-2 minutes until all the flours and starches are thoroughly combined.
- Transfer the freshly made gluten-free flour blend into an airtight container for long-term storage.
- Before each use, shake the container well to ensure the blend remains evenly distributed and prevent settling of individual flours.
Notes
Understanding the Components of a Homemade Gluten-Free Flour Blend
A successful homemade gluten-free flour blend relies on the right combination of ingredients to mimic the properties of traditional wheat flour. Key components include starches, proteins, and fibers. For instance, a blend that includes 40% starch (like potato or tapioca) can provide the necessary lightness, while 30% protein (from sources like almond or chickpea flour) adds structure. The remaining 30% can consist of fibers (such as psyllium husk) to enhance moisture retention and improve texture.
Common Pitfalls and Their Solutions
When creating a gluten-free flour blend, several common issues can arise. One major problem is a gritty texture, often caused by using coarsely ground flours. To remedy this, ensure all flours are finely milled. Another issue is a lack of binding, which can lead to crumbly baked goods. Adding xanthan gum or psyllium husk can significantly improve the cohesion of the blend. Lastly, if baked goods are too dense, consider adjusting the ratios of starch to protein, aiming for a higher starch content.
Ingredient Substitutions and Their Effects
Substituting ingredients in your gluten-free flour blend can yield varying results. For example, replacing almond flour with coconut flour will absorb more moisture, leading to drier baked goods unless additional liquid is added. Similarly, using brown rice flour instead of white rice flour can impart a nuttier flavor and slightly darker color. Understanding these trade-offs can help you customize your blend for specific recipes.
Unique Characteristics of Gluten-Free Flour Blends
One notable aspect of homemade gluten-free flour blends is their versatility. Unlike conventional flour, which has a fixed composition, gluten-free blends can be tailored to specific dietary needs or flavor profiles. This adaptability allows for experimentation with various grains and legumes, leading to unique textures and tastes in baked goods. For instance, incorporating buckwheat flour not only adds a distinct flavor but also boosts nutritional value.
Understanding the Shelf Life of Homemade Gluten-Free Flour Blend
The shelf life of your homemade gluten-free flour blend depends on the individual ingredients used. Typically, blends containing nut flours or whole grains have a shorter shelf life, approximately 1 to 3 months when stored in an airtight container in a cool, dark place. In contrast, blends made primarily from starches can last up to 6 months. To extend the freshness, consider refrigerating or freezing your blend, which can prolong its usability for up to a year. Always check for off odors or changes in texture, as these are signs that the flour has gone stale.
Scaling Your Homemade Gluten-Free Flour Blend Recipe
When scaling your homemade gluten-free flour blend, it’s essential to maintain the ratios of the ingredients to ensure consistent results. For example, if you wish to double the recipe, simply double each component. However, be cautious when scaling up beyond a certain point, as mixing larger batches can affect the uniformity of the blend. Additionally, consider the capacity of your mixing equipment; using a larger bowl or mixer may be necessary to achieve an even consistency. Always measure ingredients by weight for accuracy, especially when dealing with gluten-free flours, which can vary significantly in density.
Equipment Considerations for Mixing Gluten-Free Flour Blends
The equipment you use can significantly impact the texture and consistency of your gluten-free flour blend. A high-quality kitchen scale is essential for accurate measurements, as gluten-free flours can differ in density. A food processor or a high-speed blender can help achieve a finer texture, especially for whole grain flours. Mixing by hand can lead to uneven distribution, so consider using a whisk or a sifter to combine the ingredients thoroughly. If you have a stand mixer, it can also be an effective tool for blending larger batches, ensuring all components are evenly mixed.
How Seasonal Ingredients Affect Your Gluten-Free Flour Blend
The quality of your gluten-free flour blend can be influenced by the seasonality of the ingredients. For example, fresh nut flours made from seasonal nuts may have different flavor profiles and moisture content compared to those available out of season. Additionally, the harvest time for certain grains or starches can impact their flavor and nutritional value. When using seasonal ingredients, be mindful of their freshness and adjust your blend accordingly. This may mean tweaking the ratios slightly to account for variations in moisture or flavor intensity, ultimately affecting the final outcome of your baked goods.
How to Properly Store Your Homemade Gluten-Free Flour Blend
Storing your homemade gluten-free flour blend correctly is crucial for maintaining its freshness and functionality. Ideally, it should be kept in an airtight container in a cool, dark place, such as a pantry or cupboard. For longer shelf life, consider refrigerating or freezing the blend. When stored in the fridge, it can last up to three months, while freezing can extend its shelf life to six months or even longer. Be sure to label the container with the date of preparation to keep track of its freshness.
Scaling Your Homemade Gluten-Free Flour Blend for Larger Batches
When scaling your homemade gluten-free flour blend, it’s essential to maintain the same ratios of the ingredients to ensure consistent results. For instance, if you plan to double the recipe, simply double each component. However, be mindful of the mixing process, as larger batches may require more thorough blending to ensure even distribution of the different flours. Additionally, consider the storage implications: larger quantities may necessitate different storage containers or methods to maintain freshness.
Pairing Your Gluten-Free Flour Blend with Other Ingredients
Pairing your homemade gluten-free flour blend with complementary ingredients can enhance the final dish’s flavor and texture. For example, when using your blend in baking, consider adding ingredients like yogurt, eggs, or applesauce to improve moisture and binding. When making savory dishes, incorporating ingredients like herbs or spices can elevate the taste. Understanding how these pairings interact with your flour blend can lead to better outcomes in both baked goods and other culinary applications.
How to Adjust Your Homemade Gluten-Free Flour Blend for Seasonal Ingredients
When creating a homemade gluten-free flour blend, the quality and type of ingredients can vary significantly with the seasons. For instance, fresh produce like fruits and vegetables can influence the moisture content in baked goods. During the summer months, when humidity levels are higher, you may need to adjust the amount of liquid in your recipes to account for the increased moisture in your gluten-free flour blend. Conversely, in drier winter months, you may find that your blend requires additional hydration to achieve the desired consistency. Additionally, the availability of certain gluten-free grains or flours may change with the seasons. For example, using freshly ground flour from seasonal grains like buckwheat or millet can enhance flavor and nutrition but may also require adjustments in ratios to maintain the same texture and performance in your recipes.
Understanding the Impact of Equipment on Your Gluten-Free Flour Blend
The equipment used in preparing your homemade gluten-free flour blend can significantly affect the final product’s texture and performance. For example, using a high-speed blender versus a traditional grain mill can yield different particle sizes of flour, impacting how well it absorbs moisture and interacts with other ingredients. A finer flour will generally create a smoother batter, while a coarser blend may lead to a more rustic texture. Additionally, the mixing method can also play a role; using a stand mixer may incorporate air differently than hand mixing, affecting the rise and crumb structure of your baked goods. When scaling your blend for larger batches, consider the capacity and efficiency of your equipment, as larger quantities may require longer mixing times or adjustments in processing speeds to achieve a uniform blend.
How to Achieve the Right Consistency in Your Gluten-Free Flour Blend
Creating a homemade gluten-free flour blend requires an understanding of the specific properties of each ingredient. The consistency of the flour blend is crucial for achieving the desired texture in baked goods. The blend should mimic the properties of traditional wheat flour, which has gluten that provides structure and elasticity. To achieve this, a balance of starches and proteins is essential. For instance, using a ratio of 40% starch (like tapioca or potato starch) to 60% whole grain flour (such as brown rice or sorghum flour) can provide a good starting point. This ratio helps to create a blend that can absorb moisture effectively and provide the necessary binding without becoming too dense.
Additionally, consider the moisture content in your environment. In humid conditions, the flour may absorb more moisture, which could lead to a gummy texture in your baked goods. It may be beneficial to slightly reduce the starch content in such conditions. Conversely, in dry climates, you might need to increase the moisture content by adding a bit more starch. The key is to experiment and adjust based on the results of your baking.
Understanding the Role of Protein in Your Gluten-Free Flour Blend
Protein plays a significant role in the texture and structure of baked goods. In gluten-free baking, the absence of gluten means that alternative proteins must fill the gap to provide structure. Ingredients like almond flour, chickpea flour, or even protein powder can be incorporated into your homemade gluten-free flour blend to enhance its protein content. A blend that includes about 10-15% protein can yield better results in terms of structure and moisture retention.
When using higher protein flours, it’s essential to monitor the moisture levels in your recipes. High-protein flours can absorb more liquid, so adjustments may be necessary to avoid dry or crumbly baked goods. Additionally, consider the flavor profiles of different protein sources; for example, chickpea flour can impart a nuttier flavor compared to almond flour. Understanding these nuances will help you create a more versatile and effective gluten-free flour blend.
Pro tips
Pro tip: Best served immediately while hot!
Frequently asked questions
Can I use this flour blend for all types of baking?
This homemade gluten-free flour blend is versatile but may not work perfectly for all recipes. It’s best suited for cakes, muffins, and cookies. For bread, consider adding a higher protein content or specific ingredients like xanthan gum for better structure.
How long can I store my gluten-free flour blend?
Store your homemade gluten-free flour blend in an airtight container in a cool, dry place. It can last for up to three months at room temperature or up to six months in the refrigerator to maintain freshness.
What can I substitute if I don’t have certain flours on hand?
If you lack specific flours, you can substitute with similar types. For example, if you don’t have almond flour, you can use sunflower seed flour, but be aware that it may alter the taste and moisture content of your baked goods.
Is it necessary to add a binding agent to the flour blend?
Yes, adding a binding agent like xanthan gum or psyllium husk is recommended to improve the texture and structure of gluten-free baked goods. It helps mimic the elasticity that gluten provides in traditional flours.
More from Gluten-Free Bread & Baking →