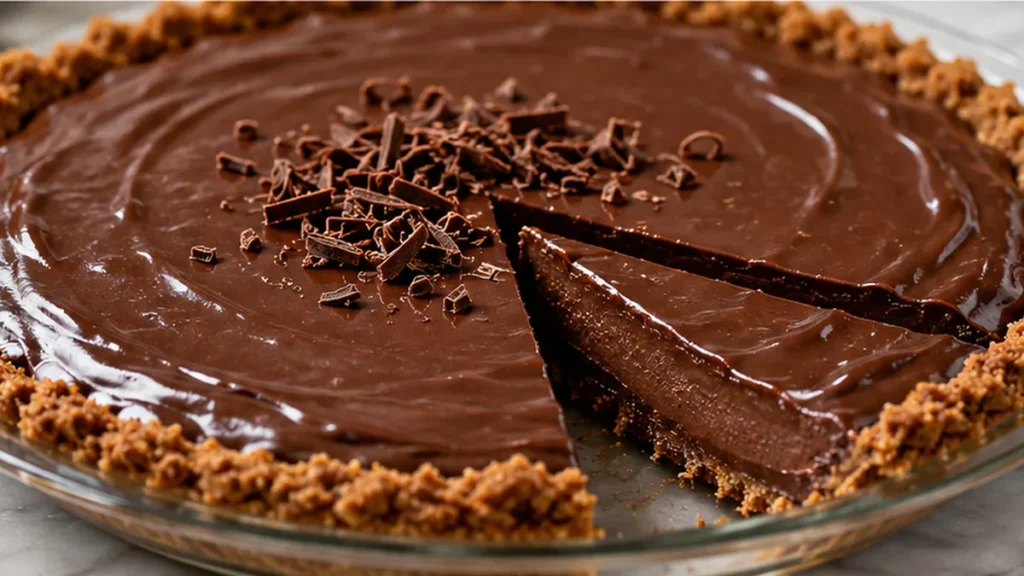
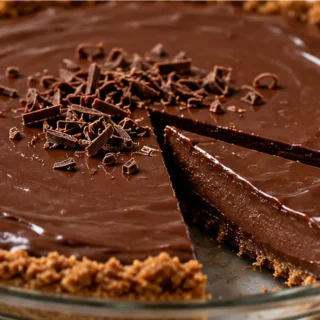
Gluten-free chocolate pie is the perfect dessert for any chocolate lover! This rich, velvety pie has a buttery graham cracker crust that complements the smooth chocolate filling beautifully. Whether you’re entertaining guests or enjoying a quiet night in, this pie is worth making. With just a few simple ingredients, you can create a decadent treat that everyone will love. This gluten-free chocolate pie is not only easy to make but also satisfying. It combines melted semi-sweet chocolate with creamy milk and egg yolks for a rich filling, complemented by the crunch of a homemade crust. It’s the perfect balance of flavors and textures that will keep you coming back for more.
Key takeaways
- Choose high-quality semi-sweet chocolate for optimal flavor.
- Ensure the butter is fully incorporated into the crust to avoid crumbling.
- Use large egg yolks at room temperature for a creamy filling.
- Allow the pie to cool completely to achieve the right texture.
Indulge in this Gluten-Free Chocolate Pie!
Ingredients
- 2 cups gluten free graham cracker crumbs
- 6 tbsp unsalted butter (melted)
- ¼ cup granulated sugar
- 10 oz semi sweet chocolate (melted but cooled to room temperature)
- 1 ½ cups whole milk
- ¾ cup granulated sugar
- 4 large egg yolks
- ¼ cup cornstarch
- 2 tbsp unsalted butter
- 2 tsp vanilla extract
Instructions
- Preheat your oven to 350°F (175°C).
- Combine the graham cracker crumbs, melted unsalted butter, and ¼ cup granulated sugar in a bowl. Press the mixture into the bottom of a pie pan to form a crust.
- In a saucepan, melt the semi sweet chocolate over low heat until smooth, then allow it to cool to room temperature.
- In a separate bowl, whisk together the whole milk, ¾ cup granulated sugar, egg yolks, and cornstarch until smooth.
- Gradually add the melted chocolate to the milk mixture, stirring well to combine. Pour this filling into the prepared crust.
- Bake in the preheated oven for 25-30 minutes or until set. Let it cool completely before serving.
- Serve with whipped cream on top, if desired.
Video
Notes
The Importance of Choosing the Right Chocolate
The type of chocolate you use significantly influences the flavor and texture of your gluten-free chocolate pie. Semi-sweet chocolate is recommended for a balanced sweetness without overpowering the other ingredients. Aim for chocolate with at least 60% cocoa content for depth of flavor. If you prefer a sweeter pie, you can opt for milk chocolate, but be aware that it will alter the overall richness and may require adjusting the sugar in the filling.
Why Your Pie Crust Might Crumble
A gluten-free pie crust can be tricky; it often crumbles if not properly combined or if the butter is not fully incorporated. Ensure that the melted butter is evenly mixed with the graham cracker crumbs and sugar. The ideal ratio of crumbs to butter is about 3:1. If the mixture feels too dry, add a tablespoon of water or milk to help it bind together without compromising the gluten-free nature.
Understanding the Role of Egg Yolks in the Filling
Egg yolks are crucial for creating a creamy texture in your filling. They act as an emulsifier, helping to blend the fats from the butter and chocolate with the liquid from the milk. For best results, use large egg yolks and ensure they are at room temperature, as this helps them incorporate more easily into the mixture. Overcooking the filling can lead to a grainy texture; aim for a cooking temperature around 160°F (71°C) to set the filling without curdling.
How to Achieve the Perfect Consistency
The cornstarch in this recipe serves as a thickening agent, helping the filling set properly. The correct ratio is crucial; too little cornstarch will leave the filling runny, while too much can create a gummy texture. For this recipe, ¼ cup of cornstarch is ideal for 1½ cups of milk. Always whisk the cornstarch with the sugar before adding it to the milk to prevent lumps from forming. Cook the filling over medium heat, stirring constantly until it thickens, which should take about 5-7 minutes.
Why Proper Cooling is Essential
Allowing the pie to cool completely before serving is vital for achieving the right texture. If served too soon, the filling may be too soft and runny. After baking, let the pie sit at room temperature for at least 2 hours, then refrigerate for at least 4 hours. This cooling period allows the filling to set properly, resulting in clean slices when serving. For best flavor, serve chilled, as the chocolate flavor intensifies as it cools.
How to Make Your Gluten-Free Chocolate Pie Ahead of Time
Preparing your gluten-free chocolate pie in advance can save you time and stress, especially for gatherings. To do this, bake the pie crust and let it cool completely. Afterward, prepare the filling and pour it into the cooled crust. Cover the pie tightly with plastic wrap or aluminum foil and refrigerate. The pie can be stored in the refrigerator for up to three days. Allow it to come to room temperature before serving for the best texture and flavor.
Understanding Equipment Variations and Their Impact on Your Pie
The tools you use can significantly affect the outcome of your gluten-free chocolate pie. For instance, using a glass pie dish allows for even baking and helps you monitor the crust’s color. If you opt for a metal pie pan, be mindful that it may bake faster, so reduce the baking time by a few minutes. Additionally, a food processor is ideal for achieving fine crumbs for the crust, while mixing by hand can result in uneven textures. Always consider the material of your equipment when adjusting baking times and temperatures.
Seasonal Ingredients and Their Effect on Flavor
Using seasonal ingredients can enhance the flavor profile of your gluten-free chocolate pie. For instance, during the fall, incorporating spices like cinnamon or nutmeg can add warmth and depth to the chocolate filling. In contrast, fresh berries in the summer can provide a refreshing contrast to the richness of the pie. Similarly, the quality of chocolate can vary with the season; using high-quality, ethically sourced chocolate can elevate your pie’s taste, making it richer and more indulgent.
Scaling Your Recipe for Different Occasions
Scaling your gluten-free chocolate pie recipe can help you cater to different group sizes. If you want to make a smaller pie, simply halve the ingredients. For larger gatherings, you can double the recipe, but be cautious of the baking time; larger pies may require additional time to set properly. Always check for doneness by gently shaking the pie; the filling should be slightly jiggly in the center but not liquid. Adjust your baking dish size accordingly to maintain the proper texture.
Why your gluten-free chocolate pie may not set properly
Achieving the perfect set for your gluten-free chocolate pie filling can be tricky. The key to a well-set filling lies in the proper combination of cornstarch and egg yolks. The cornstarch thickens the filling as it cooks, while the egg yolks provide richness and stability. Ensure you use the correct ratio: for this recipe, ¼ cup of cornstarch is combined with 4 large egg yolks. If your pie is still runny after baking, it may be due to undercooking or insufficient thickening agents. Aim for a baking temperature of 350°F (175°C) and cook until the filling is just set but still slightly jiggly in the center. Allow the pie to cool completely at room temperature before refrigerating to help it firm up further.
How to adapt your gluten-free chocolate pie for different dietary needs
If you need to adjust this gluten-free chocolate pie recipe for other dietary restrictions, there are several effective swaps. For a dairy-free version, substitute whole milk with almond or coconut milk, though this may alter the richness slightly. For a vegan option, replace the egg yolks with a combination of silken tofu and cornstarch (about 1/4 cup of puréed tofu plus 2 tablespoons of cornstarch). Keep in mind that these substitutions may affect the texture and flavor profile, so taste testing is crucial. Additionally, using a dairy-free butter alternative can help maintain the integrity of the crust without compromising the gluten-free aspect.
Why the choice of chocolate affects the flavor profile of your pie
The type of chocolate you choose for your gluten-free chocolate pie significantly influences its flavor and texture. Semi-sweet chocolate is recommended for this recipe, as it strikes a balance between sweetness and richness. However, opting for dark chocolate can intensify the flavor, providing a more robust and less sweet profile. Conversely, using milk chocolate will yield a sweeter filling with a creamier texture. When selecting chocolate, consider the cocoa content; a higher cocoa percentage (70% or more) will result in a more intense chocolate experience, while lower percentages will be sweeter and milder. Always choose high-quality chocolate, as it will directly impact the final taste of your pie.
How to Achieve the Perfect Chocolate Filling Texture
The texture of your gluten-free chocolate pie filling is crucial for a delightful dessert. The key is to carefully manage the temperature when combining the melted chocolate with the milk and egg yolks. If the chocolate is too hot, it can cause the egg yolks to scramble, resulting in a grainy texture. Aim for a temperature around 100°F (38°C) when mixing. Additionally, using whole milk contributes to a creamy consistency, while cornstarch acts as a thickening agent, providing stability. The ideal ratio is ¼ cup of cornstarch for every 1½ cups of liquid, ensuring a smooth, velvety filling.
Understanding the Role of the Crust in Your Gluten-Free Chocolate Pie
The crust is a fundamental component of your gluten-free chocolate pie, providing structure and flavor. Using gluten-free graham cracker crumbs helps achieve a texture similar to traditional pie crusts. Ensure that the melted butter is mixed thoroughly with the crumbs and sugar; this will create a cohesive mixture that holds together when pressed into the pie dish. Pressing the crust firmly into the dish is vital; a well-compacted crust will prevent crumbling when sliced. Bake the crust at 350°F (175°C) for about 10 minutes to set it, enhancing its flavor and texture. Allow it to cool completely before filling to maintain the integrity of the crust.
Pro tips
- Use a good quality chocolate for the best flavor.
- Allow the pie to cool completely before slicing to achieve clean pieces.
- Serve with a dollop of whipped cream or fresh berries for extra flair.
Try this gluten-free chocolate pie and see how delicious gluten-free desserts can be! Share your version and how it turns out!
Frequently asked questions
Can I use a different type of chocolate?
Yes, you can use milk chocolate for a sweeter pie or dark chocolate for a more intense flavor. Just keep in mind that this may require adjusting the sugar levels in the recipe to balance the sweetness.
What can I substitute for cornstarch?
You can use arrowroot powder or tapioca starch as alternatives to cornstarch. These substitutes work similarly as thickening agents, but they may slightly alter the texture of the filling.
How do I know when the filling is thick enough?
The filling should thicken enough to coat the back of a spoon. When you run your finger through it, it should hold its shape. This usually takes about 5-7 minutes of cooking over medium heat.
How can I make the pie ahead of time?
You can prepare the pie a day in advance. After baking and cooling, cover it tightly with plastic wrap and refrigerate. This allows the flavors to meld and the filling to set perfectly before serving.
More from Gluten-Free Desserts & Sweets →