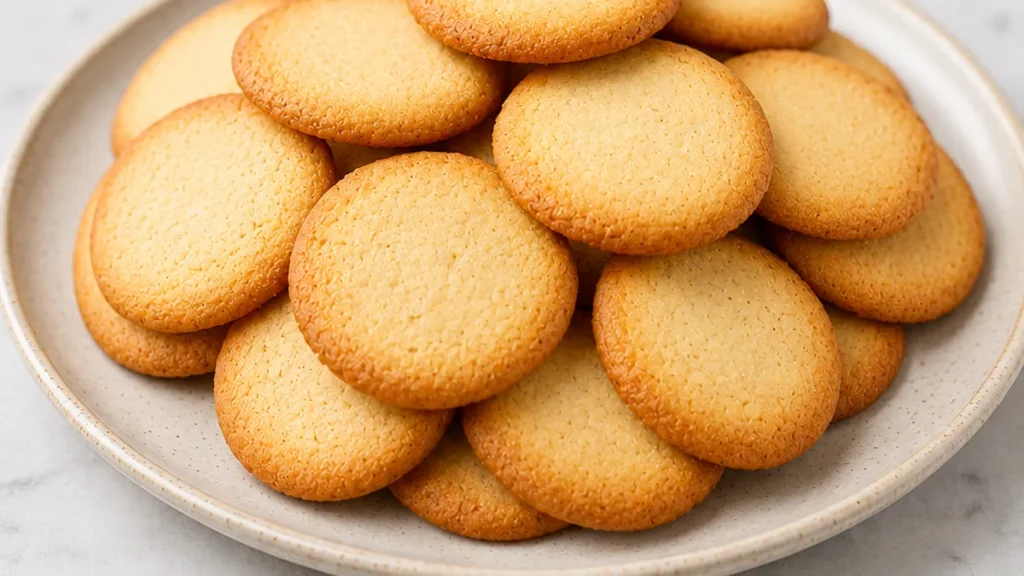
This recipe provides instructions for making gluten-free vanilla wafers. These cookies are crispy and have a distinct vanilla flavor. They are simple to prepare at home.
Key takeaways
- Creaming softened butter and sugar incorporates air for crispness.
- Room temperature ingredients ensure proper emulsification.
- Bake until edges are golden and cool completely on a wire rack for maximum crispness.
- Gluten-free flour blends with xanthan gum are essential for structure.

Crispy Gluten-Free Vanilla Wafers
Ingredients
- 1/2 cup unsalted butter (softened)
- 1/2 cup sugar
- 1 large egg (room temperature)
- 2 tablespoons milk (room temperature)
- 1 tablespoon vanilla extract
- 1 1/2 cups gluten-free all-purpose flour blend with xanthan gum
- 3/4 teaspoon baking powder
- 1/4 teaspoon salt
Instructions
- Preheat oven to 350°F (177°C) and line a baking sheet with parchment paper.
- In a large mixing bowl, cream together the butter and sugar until light and fluffy (about 2–3 minutes).
- Beat in the egg, milk, and vanilla extract until combined.
- Add the gluten-free flour blend, baking powder, and salt to the wet ingredients, and mix until a smooth dough forms.
- Drop rounded teaspoons of dough onto the prepared baking sheet, spacing them about 2 inches apart.
- Flatten each dough mound slightly with wet fingers.
- Bake for 12-14 minutes or until the edges are lightly golden.
- Allow the cookies to cool on the baking sheet for 5 minutes, then transfer to a wire rack to cool completely.
Notes
The technique that makes it
The key to achieving perfectly crispy gluten-free vanilla wafers lies in a combination of ingredient temperature, proper dough handling, and baking. Ensuring the butter is softened, not melted, is crucial for incorporating air during creaming with the sugar. This aeration contributes to the cookie’s structure and eventual crispness. Room temperature egg and milk also emulsify better with the fat and sugar, creating a smoother, more cohesive dough that bakes evenly. Overmixing the gluten-free flour blend can lead to a tougher cookie, even without gluten, so mix only until just combined. The thinness of the dough is intentional; it allows the wafers to spread and bake through quickly, resulting in a delicate, crisp texture. Baking until the edges are golden brown is your visual cue for doneness. Gluten-free baked goods can sometimes appear paler than their gluten-containing counterparts, so don’t rely solely on color. Cooling completely on a wire rack is essential to allow steam to escape, preventing any residual softness and ensuring maximum crispness.
Troubleshooting
- Problem: Cookies are too soft or chewy.
Fix: Ensure you baked them long enough until the edges are visibly golden brown. Also, confirm they have cooled completely on a wire rack, allowing all moisture to dissipate. Re-baking at a slightly lower temperature for a few extra minutes can sometimes help achieve desired crispness. - Problem: Cookies spread too much and are uneven.
Fix: This can happen if the butter was too soft or melted, or if the dough was overworked. Try chilling the dough for 15-30 minutes before piping or dropping. Ensure your baking sheets are not overcrowded. - Problem: Cookies are hard and dense.
Fix: This might indicate overmixing the gluten-free flour, leading to a tough texture, or overbaking. Measure your flour accurately, and mix the dough only until the ingredients are just incorporated. Reduce baking time slightly in your next batch. - Problem: Wafers are crumbly and fall apart.
Fix: This often points to an imbalance in the dry ingredients or insufficient binding. Ensure your gluten-free flour blend contains xanthan gum, as it’s vital for structure in gluten-free baking. Check that your baking powder is fresh.
Substitutions
- Gluten-Free Flour Blend: If your blend does not contain xanthan gum, you will need to add approximately 1/2 teaspoon of xanthan gum to the dry ingredients. The results will be similar, but the structure might be slightly less cohesive without it.
- Milk: You can substitute dairy milk with a non-dairy alternative like almond milk, soy milk, or oat milk. Use an unsweetened, plain variety for the best flavor neutrality. The texture should remain largely unaffected.
- Sugar: Granulated sugar can be replaced with caster sugar for a finer texture, or with coconut sugar for a slightly different flavor profile and color. The crispness may vary slightly depending on the sugar used.
- Vanilla Extract: For a different flavor note, you could try almond extract or a touch of lemon zest. Use almond extract sparingly as it’s potent. Lemon zest will add a bright, citrusy undertone.
Pro tips
- Ensure your butter and egg are at room temperature for optimal creaming.
- Use a good quality gluten-free all-purpose flour blend that contains xanthan gum.
- Do not overmix the dough once the flour is added to keep the wafers tender.
- Bake until the edges are just golden; they will crisp up more as they cool.
Enjoy these wonderfully crisp gluten-free vanilla wafers, a testament to delightful home baking. Share them with loved ones or savor them yourself!
More from Gluten-Free Desserts & Sweets →
Frequently asked questions
Can I make gluten-free vanilla wafers ahead of time?
Yes, these gluten-free vanilla wafers can be made ahead. Once completely cooled, store them in an airtight container at room temperature for up to 5 days. They maintain their crispness well when stored properly, making them ideal for baking in advance for parties or holidays.
What can I substitute for almond flour in gluten-free vanilla wafers?
For a nut-free option, you can substitute a gluten-free all-purpose flour blend that contains a binder like xanthan gum. Alternatively, a combination of rice flour and tapioca starch, or even oat flour (certified gluten-free), can work, though the texture might vary slightly.
How do I know when my gluten-free vanilla wafers are done baking?
The wafers are done when their edges are lightly golden brown and they feel firm to the touch. They will continue to crisp up as they cool on the baking sheet. Avoid overbaking, as they can go from golden to burnt very quickly due to their thinness.
What is the best way to store homemade gluten-free vanilla wafers?
Store completely cooled gluten-free vanilla wafers in an airtight container at room temperature. Ensure no moisture can get in, as this will make them soft. They should remain crisp for up to 5 days. Avoid refrigerating them, as the humidity can affect their texture.