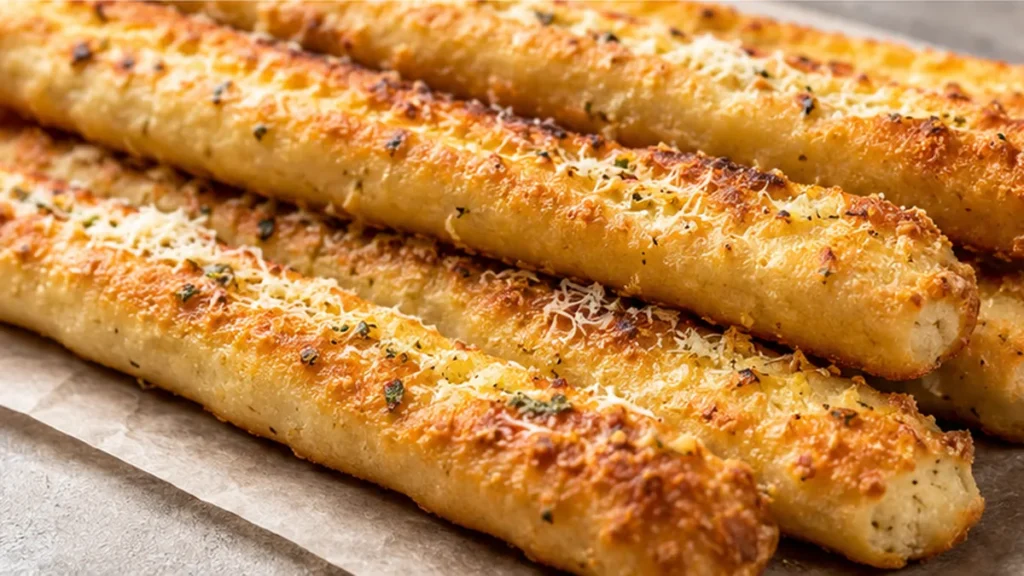
Gluten-free breadsticks require careful management of the dough’s stickiness to achieve the right texture. It should be pliable but not overly wet, allowing for easy shaping without excessive flour. This recipe delivers that perfect balance, creating tender breadsticks with a satisfying chew and a crispy exterior.
Key takeaways
- Using a quality gluten-free flour blend is key to texture.
- Proper yeast activation is crucial for rising.
- Melted butter enhances flavor and crispiness.
- Avoid overmixing to maintain a light texture.
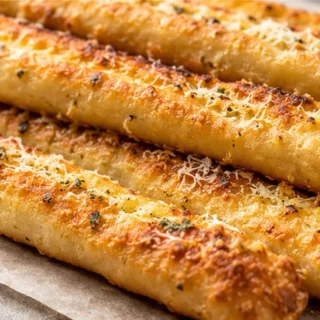
Crispy Garlic Gluten-Free Breadsticks
Ingredients
- 3 ½ cups gluten free flour
- 1 packet instant yeast (2 ¼ teaspoons)
- 3 tbsp sugar
- 1 tsp salt
- 2 eggs (beaten and at room temperature)
- 1 ¼ cup warm water
- ⅓ cup butter (melted)
- 3 tbsp butter (melted)
- 1 ½ tbsp Parmesan
- ½ tsp garlic powder
Instructions
- Line two baking trays with parchment paper.
- In a medium bowl, stir together flour, salt, sugar, and instant yeast. Add warm water, melted butter (⅓ cup), and beaten eggs. Mix until a dough forms.
- Transfer dough to a clean, lightly floured surface. Shape into a round, cut in half, and cover one half.
- Split dough into 5 equal pieces and shape each into a breadstick log. Transfer to baking trays.
- Let dough rest while preheating oven to 375°F. Bake breadsticks for 10-15 minutes until golden.
- While baking, combine remaining melted butter (3 tbsp), Parmesan, and garlic powder for the topping.
- When bread comes out of the oven, generously brush with garlic butter and serve hot.
Video
Notes
Understanding the Role of Gluten-Free Flour in Breadstick Texture
Gluten-free flour blends are crucial for achieving the right texture in gluten-free breadsticks. Unlike traditional wheat flour, gluten-free options lack the protein gluten, which provides elasticity. The combination of starches and fibers in gluten-free flour helps to bind ingredients and create a chewy yet crispy texture. Aim for a blend that includes xanthan gum or psyllium husk to mimic gluten’s properties. For best results, measure 3½ cups (around 420 grams) of your chosen gluten-free flour blend for optimal hydration and structure.
How Yeast Activation Affects Breadstick Rise
Instant yeast is essential for leavening gluten-free breadsticks. When mixed with warm water (ideally around 100°F to 110°F or 37°C to 43°C), it activates and begins to produce carbon dioxide, which helps the dough rise. Allow the mixture to sit for 5-10 minutes until it becomes frothy before adding it to the dry ingredients. This step ensures that the yeast is alive and effective, contributing to the desired lightness in your breadsticks.
Achieving Perfect Crispiness with Butter and Baking Techniques
The use of melted butter not only enriches the flavor of gluten-free breadsticks but also aids in achieving a crispy exterior. Brush the breadsticks with a mixture of 3 tablespoons of melted butter, 1½ tablespoons of Parmesan cheese, and ½ teaspoon of garlic powder before baking. Bake at 375°F (190°C) for 15-20 minutes, or until golden brown. The Maillard reaction, which occurs at these temperatures, creates that desirable crispy crust.
Why Overmixing Can Ruin Your Breadsticks
Gluten-free dough is sensitive to overmixing. Unlike gluten-based dough, which benefits from kneading, gluten-free dough should be mixed just until combined. Overmixing can lead to a dense texture. Aim for a gentle mix after adding the wet ingredients, ensuring no dry flour remains, but avoid vigorous stirring. This will help maintain the lightness of the breadsticks.
Identifying Common Mistakes in Breadstick Preparation
Several common mistakes can lead to unsatisfactory gluten-free breadsticks:
- Too Much Liquid: If your breadsticks are too sticky, reduce the water slightly next time.
- Inadequate Yeast Activation: If the dough doesn’t rise, ensure your yeast is fresh and activate it properly.
- Underbaking: For a crispy texture, ensure they are baked long enough until golden brown.
- Using the Wrong Flour Blend: Stick to a reliable gluten-free flour blend for best results.
Understanding the Impact of Ingredient Quality on Breadstick Flavor
The quality of your ingredients can significantly influence the flavor profile of your gluten-free breadsticks. For instance, using high-quality gluten-free flour that contains a blend of rice flour, tapioca starch, and potato starch can enhance the texture and taste. Fresh instant yeast is crucial; expired yeast can lead to poor rising and denser breadsticks. Additionally, using unsalted butter allows for better control over the salt content, ensuring that the breadsticks are not overly salty. Aim for butter that is rich and creamy for the best flavor, as this will contribute to the overall richness of the dish.
Scaling the Recipe for Larger Gatherings
If you’re looking to serve a larger crowd, scaling the recipe for gluten-free breadsticks is straightforward but requires attention to detail. Doubling or tripling the ingredients is feasible, but keep in mind that the baking time may vary. For instance, if you are baking a larger batch, the breadsticks may need an additional 5-10 minutes in the oven to achieve that golden brown exterior. Ensure that you spread the breadsticks out on the baking tray to allow for even cooking. Also, consider using multiple baking sheets to prevent overcrowding, which can lead to uneven baking.
Equipment Considerations for Optimal Results
The type of equipment you use can affect the outcome of your gluten-free breadsticks. A stand mixer can be beneficial for thoroughly mixing the dough, ensuring that all ingredients are well incorporated without overmixing. If you don’t have a stand mixer, a sturdy hand mixer will also suffice. For baking, using a baking stone can help achieve a crispier bottom, while a regular baking sheet works just fine as well. Additionally, parchment paper can be used to prevent sticking and make cleanup easier. Preheating your oven is essential; an oven thermometer can ensure the temperature is accurate, as ovens can often be off by several degrees.
Optimal Serving Suggestions for Gluten-Free Breadsticks
When it comes to serving your gluten-free breadsticks, pairing them with the right accompaniments can elevate the dish. These breadsticks are excellent with marinara sauce, garlic butter, or a rich cheese dip. For a more gourmet experience, consider serving them alongside a fresh herb-infused olive oil for dipping. The versatility of these breadsticks allows them to complement a variety of dishes, from Italian pasta meals to hearty soups. Additionally, they can be served warm straight from the oven or at room temperature, making them a fantastic option for gatherings.
How to Prepare Gluten-Free Breadsticks in Advance
Making crispy garlic gluten-free breadsticks ahead of time can be a game changer for meal prep. To do this, prepare the dough as instructed, allowing it to rise for about 30 minutes. Once the dough has risen, shape the breadsticks and place them on a baking sheet lined with parchment paper. At this stage, you can either freeze them directly or let them cool and store them in an airtight container in the refrigerator for up to 24 hours. If freezing, ensure they are spaced apart to prevent sticking. When ready to bake, preheat your oven to 375°F (190°C) and bake from frozen for about 15-20 minutes, or until golden brown. This method preserves the texture and flavor while allowing for convenient serving.
Adapting Gluten-Free Breadsticks for Seasonal Ingredients
Seasonal ingredients can elevate your gluten-free breadsticks, enhancing flavor and nutrition. For instance, incorporating fresh herbs like rosemary or thyme during the mixing process can add aromatic notes. Alternatively, seasonal vegetables, such as finely chopped spinach or sun-dried tomatoes, can be added to the dough for a nutritional boost. However, be mindful of the moisture content; adding too many wet ingredients can affect the dough’s consistency. When using fresh ingredients, consider adjusting the flour ratio slightly, perhaps increasing it by 10-15% to maintain the right texture. This adaptability allows for a unique twist on the classic recipe, making it suitable for various occasions.
Understanding the Impact of Equipment on Breadstick Quality
The equipment you use can significantly influence the outcome of your gluten-free breadsticks. For instance, using a stand mixer with a dough hook can help achieve a uniform texture by thoroughly mixing the ingredients without overworking the dough. If using a hand mixer, be cautious not to overmix, as it can lead to a denser product. Additionally, the type of baking sheet can affect the crispiness; a dark, non-stick baking sheet may yield a crunchier exterior compared to a light-colored one. Always line your baking sheet with parchment paper for easy removal and to prevent sticking. Lastly, using an oven thermometer ensures your baking temperature is accurate, which is crucial for achieving the perfect rise and browning.
Understanding the Effects of Ingredient Quality on Breadstick Flavor
The choice of ingredients significantly influences the flavor profile of gluten-free breadsticks. Using high-quality gluten-free flour, such as a blend that includes almond flour or rice flour, can enhance the nutty and rich flavors. Fresh ingredients, particularly the butter and Parmesan cheese, contribute to a more robust taste. For instance, aged Parmesan has a sharper flavor compared to younger varieties. Additionally, using fresh garlic instead of garlic powder can elevate the flavor complexity, providing a more aromatic and savory experience. It’s essential to note that different brands of gluten-free flour may vary in taste and texture, so experimentation is key to finding the perfect blend for your palate.
How to Achieve the Perfect Texture in Gluten-Free Breadsticks
The texture of gluten-free breadsticks is crucial for achieving that desired crispy exterior and soft interior. The hydration level of the dough plays a pivotal role; ideally, the dough should be moist but not overly sticky. A good starting point is maintaining a hydration ratio of about 70% (1.25 cups of water to 3.5 cups of flour). This balance allows for proper expansion during baking. Furthermore, incorporating melted butter into the dough not only adds flavor but also contributes to a tender crumb by coating the flour particles. It’s also beneficial to let the dough rest for about 30 minutes before shaping, allowing the flour to absorb moisture fully. This resting period can enhance the overall texture and prevent the breadsticks from becoming dense.
Pro tips
- Don’t over-flour the dough: a slightly sticky dough is normal for gluten-free recipes and will result in softer breadsticks.
- For best results, ensure your eggs are at room temperature so they incorporate smoothly into the dough.
- These breadsticks are best served warm. If making ahead, reheat in a 350°F oven for 5-7 minutes.
- Cook to an internal temperature of 200-210°F (93-99°C) for optimal texture. A simple visual cue is golden-brown edges.
Enjoy these delicious gluten-free breadsticks as a side to your next Italian meal or a comforting bowl of soup. Feel free to experiment with different herb additions to the garlic butter for a personalized touch!
Frequently asked questions
Can I use regular flour instead of gluten-free flour?
No, using regular flour will not yield gluten-free breadsticks. The recipe is specifically designed to work with gluten-free flour blends, which provide the necessary structure without gluten.
How can I make these breadsticks dairy-free?
To make gluten-free breadsticks dairy-free, substitute the melted butter with a dairy-free alternative like coconut oil or a plant-based butter. Ensure the Parmesan is replaced with a dairy-free cheese or omitted for a lighter flavor.
What if my dough is too dry?
If your dough feels too dry, gradually add more warm water, a tablespoon at a time, until the desired consistency is achieved. The dough should be moist but not sticky.
How long can I store leftover breadsticks?
Leftover gluten-free breadsticks can be stored in an airtight container at room temperature for up to 2 days. For longer storage, freeze them for up to 3 months, and reheat in the oven to restore crispness.
More from Gluten-Free Bread & Baking →