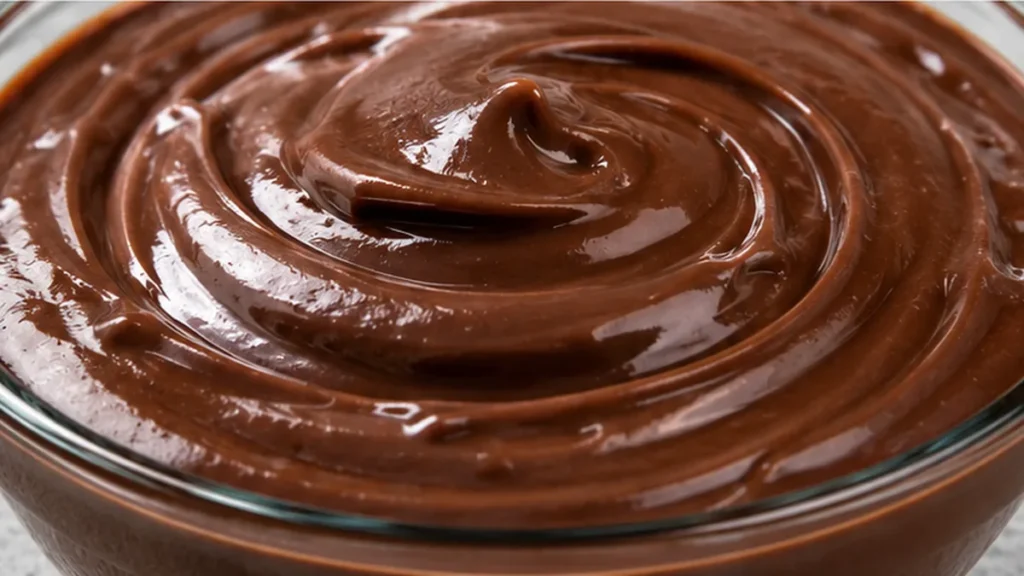
Dairy-free pudding achieves its creamy texture through the right balance of cornstarch and liquid, along with careful heat management. This dairy-free pudding recipe delivers an incredibly smooth, rich chocolate dessert that rivals any traditional version, perfect for those with dietary restrictions or simply looking for a delicious plant-based treat. This dairy-free pudding is not just for special diets; it’s a wonderfully simple and satisfying dessert for anyone craving a classic chocolate indulgence without the heaviness of dairy. Dairy-free pudding can come out too thin; whisking constantly until it coats the spoon is key to the right consistency.
Key takeaways
- Use unsweetened soy milk for the best texture.
- Mix cornstarch with cold liquid to prevent clumping.
- Cook until just thickened to avoid a chalky taste.
- Experiment with cocoa types for different flavor profiles.
Silky Dairy-Free Chocolate Pudding!
Ingredients
- 2 cups soy milk (divided)
- 3 tbsp cornstarch
- ½ cup granulated sugar
- ¼ cup unsweetened cocoa powder (sifted)
- ⅛ tsp salt
- ¼ cup dairy-free semisweet chocolate chips
- 2 tsp vanilla extract
Instructions
- In a small bowl, stir together ½ cup soy milk with the cornstarch until completely dissolved.
- In a medium-sized saucepan, whisk together the soy milk and cornstarch mixture, the remaining soy milk, granulated sugar, sifted cocoa powder, and salt. Whisk constantly over low-medium heat until the mixture starts to simmer lightly.
- Once the mixture starts to simmer gently, stir in the chocolate chips. Reduce heat to low. Whisk constantly while the chocolate chips melt into the pudding and the pudding starts to thicken within a minute or two, coating the back of a spoon.
- Remove saucepan from heat and stir in vanilla extract.
- Pour pudding into a glass bowl or individual small glass containers, cover with food-safe plastic wrap directly on top (touching) the pudding to prevent a skin from forming, and refrigerate for 3 hours before serving.
- Serve chilled for optimal enjoyment.
Video
Notes
The Importance of Choosing the Right Dairy-Free Milk
Using soy milk in this dairy-free pudding is crucial for achieving the desired creamy texture. Soy milk has a protein content similar to that of cow’s milk, which helps in thickening the pudding effectively. For optimal results, use unsweetened soy milk to control the sugar levels in the recipe. Each cup of soy milk weighs approximately 240 grams, which contributes to the overall consistency of the pudding.
Mastering the Thickening Process with Cornstarch
Cornstarch acts as the primary thickening agent in this recipe. When combined with liquid and heated, cornstarch granules absorb moisture and swell, creating a gel-like consistency. It’s essential to mix the cornstarch with a portion of the soy milk before adding it to the heat to avoid clumping. For best results, maintain a temperature of around 90-95°C (194-203°F) while cooking, stirring continuously for about 5-7 minutes until the mixture thickens.
Common Issues with Texture and How to Fix Them
- Issue: Pudding is grainy.
- Cause: Cornstarch was not dissolved properly before heating.
- Fix: Ensure you mix cornstarch with cold soy milk until fully incorporated before heating.
- Issue: Pudding is too thin.
- Cause: Insufficient cooking time or incorrect cornstarch ratio.
- Fix: Increase cooking time slightly or add more cornstarch, one tablespoon at a time, until desired thickness is achieved.
- Issue: Pudding has a chalky taste.
- Cause: Overcooked cornstarch.
- Fix: Cook just until thickened; avoid boiling.
Flavor Enhancements and Substitutions
While this recipe uses unsweetened cocoa powder, you can substitute it with Dutch-processed cocoa for a smoother flavor. However, this will darken the pudding and reduce its acidity. If you prefer a sweeter pudding, consider using maple syrup or agave nectar instead of granulated sugar; this will alter the texture slightly but add a unique flavor profile. For a richer taste, you may also use dark chocolate chips instead of semisweet, which will increase the cocoa content.
The Unique Creaminess of Dairy-Free Chocolate Pudding
This dairy-free chocolate pudding stands out due to its use of dairy-free chocolate chips, which melt seamlessly into the mixture, providing a rich and indulgent flavor without the use of dairy. This aspect differentiates it from traditional chocolate puddings, which rely on heavy cream or milk for creaminess. The combination of soy milk and dairy-free chocolate chips creates an emulsion that contributes to the pudding’s luxurious mouthfeel.
How to Properly Store Leftover Dairy-Free Pudding
Proper storage is essential to maintain the texture and flavor of your dairy-free pudding. Once prepared, allow the pudding to cool to room temperature before transferring it to an airtight container. Store it in the refrigerator, where it can last for up to 5 days. To prevent a skin from forming on the surface, place a piece of plastic wrap directly on the pudding before sealing the container. If you notice any separation upon refrigeration, simply stir the pudding gently before serving.
Scaling the Recipe for Larger Gatherings
If you want to serve a crowd, scaling this dairy-free pudding recipe is straightforward. Doubling the ingredients will yield approximately 4 cups of pudding, while tripling them will provide about 6 cups. Ensure you use a larger saucepan to accommodate the increased volume. Keep in mind that the cooking time may slightly increase, so monitor the pudding closely as it thickens. A larger batch may take an additional 2-4 minutes to reach the desired consistency. Adjusting the sugar content can also help if you’re serving a group with varying sweetness preferences.
Choosing the Right Equipment for Optimal Results
The equipment you use can significantly impact the outcome of your dairy-free pudding. A heavy-bottomed saucepan is ideal for even heat distribution, preventing scorching. A whisk is essential for blending the ingredients smoothly, while a heat-resistant spatula can help scrape the edges of the pan and ensure no lumps form. If you have a fine-mesh sieve, consider straining the pudding after cooking to achieve an ultra-smooth texture. Using a blender to combine the pudding after it has cooled can also enhance its creaminess.
Seasonal Ingredient Impact on Flavor and Texture
Ingredient quality can vary with the seasons, affecting the final flavor and texture of your dairy-free pudding. For instance, using high-quality cocoa powder can greatly enhance the chocolate flavor, while fresh, organic soy milk can contribute to a creamier texture. In colder months, consider adding warming spices like cinnamon or nutmeg to complement the rich chocolate flavor. Conversely, in warmer months, you might prefer to serve the pudding chilled with fresh fruit toppings like berries or citrus zest, which can brighten the flavor profile.
How to Achieve the Perfect Consistency for Dairy-Free Pudding
Achieving the right consistency in dairy-free chocolate pudding hinges on the precise use of cornstarch as a thickening agent. The typical ratio is about 1 tablespoon of cornstarch for every cup of liquid. For this recipe, using 3 tablespoons of cornstarch for 2 cups of soy milk is ideal. When heated, cornstarch granules swell and absorb liquid, thickening the mixture. Ensure the pudding is brought to a gentle simmer, around 190°F (88°C), and stirred continuously until it thickens, which usually takes about 5-7 minutes. If the mixture is undercooked, it may remain runny; if overcooked, it can become grainy. Always remember to sift cocoa powder to avoid lumps that could affect the texture.
How Ingredient Quality Affects the Final Flavor and Texture
The quality of ingredients plays a crucial role in the flavor and texture of dairy-free chocolate pudding. Using high-quality cocoa powder can significantly enhance the chocolate flavor, while dairy-free semisweet chocolate chips should be chosen for their smooth melting properties. Look for brands that contain minimal additives and have a rich cocoa content (preferably 70% or higher). The soy milk should be unsweetened to maintain control over the sweetness level, as granulated sugar is already included. Seasonal variations in the quality of ingredients, such as the freshness of cocoa powder, can also affect the final taste, making it essential to check expiration dates and storage conditions.
Adapting Serving Sizes for Different Occasions
Scaling this dairy-free pudding recipe for larger gatherings or smaller servings is straightforward. To double the recipe, simply use 4 cups of soy milk, 6 tablespoons of cornstarch, and adjust the sugar and cocoa accordingly, maintaining the same ratios. For smaller servings, halving the recipe is just as easy. However, be mindful that cooking times might slightly vary with batch sizes. When serving, consider pairing the pudding with fresh fruits like berries or a sprinkle of sea salt to enhance the chocolate flavor. Additionally, serving in individual cups or jars can elevate the presentation, making it more appealing for gatherings.
Understanding the Cooling Process for Dairy-Free Pudding
The cooling phase is crucial for achieving the right texture in dairy-free chocolate pudding. After cooking, the pudding should be transferred to a bowl and covered with plastic wrap, ensuring the wrap touches the surface to prevent a skin from forming. Allow it to cool at room temperature for about 30 minutes before refrigerating. Once refrigerated, the pudding should set for at least 2 hours, ideally 4 hours, to reach its optimal consistency. During this time, the cornstarch continues to thicken the pudding as it cools. If left too long at room temperature, the pudding may lose its smooth texture and become grainy. Aim for a final temperature of around 40°F (4°C) for serving.
Scaling Up the Recipe Without Compromising Texture
When scaling the recipe for larger gatherings, it’s essential to maintain the same ratios of ingredients to ensure consistent texture and flavor. For every additional batch of this dairy-free pudding, use an additional 1 cup of soy milk, 1.5 tablespoons of cornstarch, ¼ cup of granulated sugar, and 2 tablespoons of cocoa powder. However, be cautious with the cooking time; larger volumes may require a few extra minutes of cooking to reach the desired thickness. It’s also advisable to use a larger pot to prevent the pudding from boiling over. When increasing the batch size, monitor the pudding closely to avoid overcooking, which can lead to a rubbery texture due to excessive starch gelatinization.
Pro tips
– Use a good quality unsweetened cocoa powder for the best chocolate flavor. – Whisk constantly to prevent lumps and ensure even thickening. – To avoid a ‘skin’ forming on top, press plastic wrap directly onto the surface of the warm pudding before chilling. – For storage, this pudding keeps well in an airtight container in the refrigerator for up to 3-4 days.
This dairy-free chocolate pudding is a fantastic, versatile dessert. Experiment with different plant-based milks like almond or oat milk, keeping in mind they might alter the final consistency slightly. Enjoy this delightful treat!
Frequently asked questions
Can I use almond milk instead of soy milk?
Yes, almond milk can be used, but it has a lower protein content, which may result in a thinner pudding. You may need to adjust the amount of cornstarch to achieve the desired thickness.
How long does the pudding need to chill?
After cooking, allow the pudding to cool at room temperature for about 15-20 minutes, then refrigerate for at least 2 hours to set properly. This chilling time enhances the texture and flavor.
Can I make this pudding sugar-free?
Yes, you can use sugar substitutes like erythritol or stevia. Just be mindful of the sweetness level, as these substitutes can vary in sweetness compared to granulated sugar.
What is the best way to store leftovers?
Store any leftover pudding in an airtight container in the refrigerator for up to 3 days. To prevent a skin from forming, place a piece of plastic wrap directly on the surface of the pudding before sealing the container.
More from Gluten-Free Desserts & Sweets →