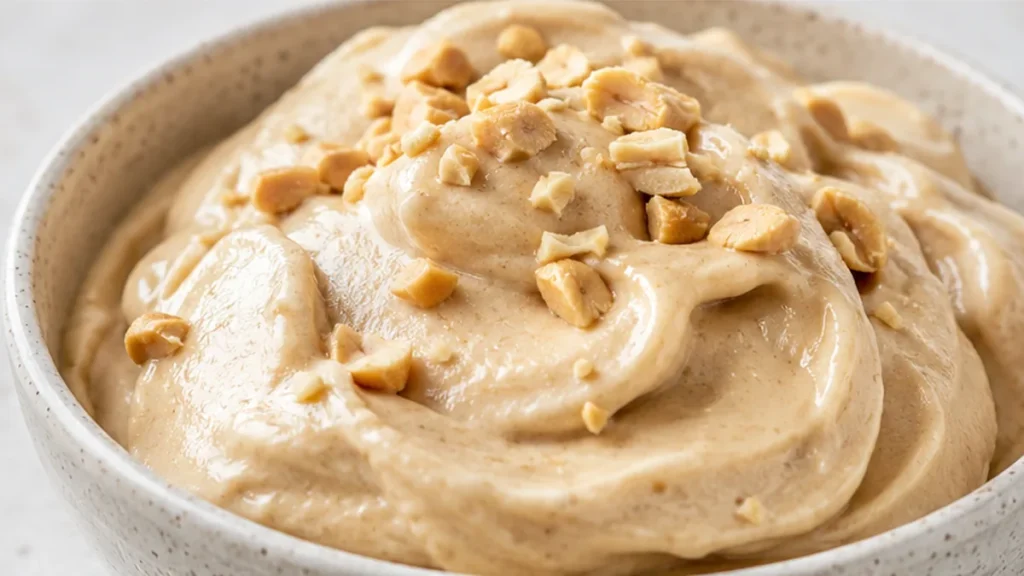
The secret to a truly creamy and healthy dessert lies in perfectly ripe, frozen bananas. This banana ice cream, often called ‘nice cream’, transforms simple fruit into a luxurious treat without any dairy or added sugar (unless you want it!). It’s an ideal solution for satisfying sweet cravings with a nutritious twist. Our banana ice cream recipe highlights the natural sweetness and texture of bananas, complemented by the rich flavor of peanut butter. It’s incredibly versatile and quick to prepare, making it a fantastic option for a healthy dessert or a post-workout snack.
Key takeaways
- Use ripe bananas for natural sweetness and creaminess.
- Blend until fully emulsified for the best texture.
- Adjust almond milk for desired consistency.
- Experiment with nut butters and sweeteners for variation.
Dreamy Banana Peanut Butter ‘Nice Cream’
Ingredients
- 3 ripe bananas, cut into coins and frozen
- ¼ cup natural peanut butter
- 1 tsp vanilla extract
- pinch salt
- 2 tsp maple syrup (if needed)
- 2 tbsp unsweetened almond milk (or other plant-based milk)
Instructions
- Place your ice cream container in the freezer for at least 30 minutes while you prepare your ice cream.
- Peel and slice ripe bananas into coins, ensuring they have some brown spots for optimal sweetness. Seal them in a freezer-safe bag and freeze for at least 4 hours until solid.
- Once frozen, add the bananas, peanut butter, vanilla, and salt to a blender or food processor. Blend until the mixture is smooth and creamy, stopping to stir or let it warm for 10 minutes if needed.
- Taste the mixture and add up to 2 teaspoons of maple syrup if additional sweetness is desired, then blend again briefly.
- Transfer the creamy mixture to your pre-chilled ice cream container, smoothing the top.
- Freeze overnight or for 6-8 hours until firm. Serve with your favorite toppings.
Video
Notes
The technique that makes it
The key to achieving the perfect banana ice cream texture lies in the freezing and blending process. By slicing ripe bananas into coins and freezing them, you create a base that is not only sweet but also creamy when blended. The natural sugars in the bananas caramelize slightly during freezing, enhancing the flavor. When blended with peanut butter and almond milk, the mixture emulsifies, creating a smooth and creamy texture. It’s important to blend until fully combined, as under-blending can lead to a grainy texture.
Troubleshooting
- Issue: The nice cream is too thick and difficult to blend.
Fix: Add a bit more almond milk, one tablespoon at a time, until the desired consistency is reached. - Issue: The flavor is too bland.
Fix: Incorporate an additional teaspoon of maple syrup or a pinch more salt to enhance the sweetness and depth of flavor. - Issue: The mixture is icy and not creamy.
Fix: Ensure the bananas are fully ripe before freezing, as under-ripe bananas can lead to a less creamy texture. - Issue: The nice cream is too sweet.
Fix: Reduce or omit the maple syrup and adjust the peanut butter to balance the sweetness.
Substitutions
- Peanut butter: Use almond butter or cashew butter for a different nutty flavor while maintaining creaminess.
- Almond milk: Substitute with coconut milk for a richer, creamier texture.
- Maple syrup: Honey or agave syrup can be used as a sweetener, though this will alter the vegan status.
- Vanilla extract: Use a splash of almond extract for a unique flavor twist.
Pro tips
- For the creamiest ‘nice cream,’ use bananas that are very ripe, almost with black spots. They’ll be sweeter and blend smoother.
- Don’t rush the freezing process for your banana coins. Solidly frozen bananas are key to the right texture. When short on time, spread them in a single layer on a parchment-lined tray to freeze faster before transferring to a bag.
- If your blender struggles, stop and scrape down the sides. A powerful food processor can also work wonders for a smoother consistency.
- For storage, freeze in an airtight container for up to 2 weeks. Let it soften slightly at room temperature for 10-15 minutes before scooping.
This Banana Peanut Butter ‘Nice Cream’ offers a delightful and healthy way to enjoy a frozen treat. Experiment with different toppings or add a sprinkle of cocoa powder for a chocolatey twist. Enjoy every guilt-free scoop!
Frequently asked questions
Can I use unripe bananas for this recipe?
It is best to use ripe bananas, as they provide natural sweetness and a creamy texture. Unripe bananas may result in a less flavorful and grainy nice cream.
How long can I store the banana nice cream?
Banana nice cream can be stored in an airtight container in the freezer for up to one week. However, for optimal texture, it is best enjoyed fresh.
Is this recipe suitable for those with nut allergies?
If you have nut allergies, you can substitute peanut butter with sun butter or omit it entirely. Adjust the recipe to maintain creaminess using extra almond milk or a suitable alternative.
Can I add other ingredients like chocolate or fruit?
Yes, you can add cocoa powder for a chocolate flavor or blend in other frozen fruits like strawberries or mangoes for added variety and flavor in your banana nice cream.
More from Gluten-Free Desserts & Sweets →