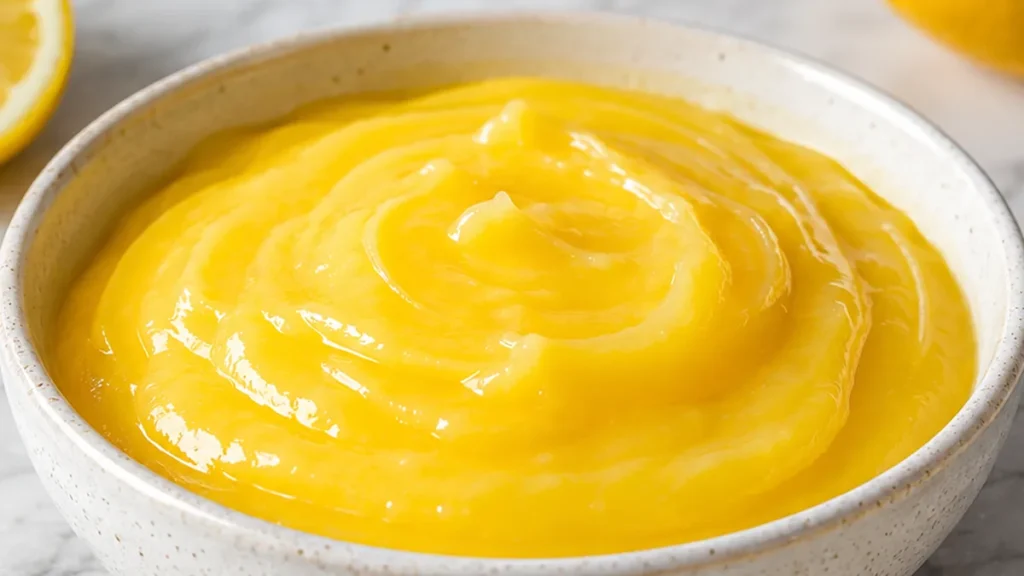
Homemade lemon curd is a truly delightful treat, far superior to anything store-bought, offering a burst of bright, tangy flavor that elevates any dessert or breakfast. This lemon curd recipe is designed for both beginners and experienced bakers, ensuring a perfectly smooth and luscious result every time. What makes this lemon curd special is the precise tempering of eggs and careful cooking, which prevents scrambling and ensures that signature velvety texture. Rushing the heating process turns lemon curd into scrambled eggs, so patience and gentle heat control matter. This recipe is for anyone who appreciates the vibrant taste of fresh lemons and desires to create a versatile, elegant, and incredibly delicious condiment or dessert component.
Key takeaways
- Gentle, consistent heat is crucial to prevent scrambled eggs.
- Stirring constantly ensures even cooking and prevents scorching.
- Strain the curd for a perfectly smooth texture.
- Chill the curd thoroughly for it to thicken properly.
Zesty Lemon Curd: Brightest Homemade Treat!
Ingredients
- 3 large eggs
- 4 egg yolks (from 4 large eggs)
- 3/4 cup fresh lemon juice (4-5 lemons)
- 3/4 cup granulated sugar
- 1/4 teaspoon salt
- 4 tablespoons cold butter (cut into cubes)
- 1 teaspoon vanilla extract
Instructions
- Prepare: Place a fine mesh sieve over a medium-size glass bowl then set aside.
- Whisk: Add whole eggs plus egg yolks to another medium-size glass bowl then vigorously whisk until smooth.
- Heat: To a medium-size, heavy-bottom saucepan add the lemon juice, sugar, and salt. Turn the heat to medium then whisk to combine the ingredients. Cook while slowly whisking until the sugar has dissolved, 2-3 minutes.
- Temper: Remove the pan from the heat then slowly stream ~3/4 cup of the hot lemon-sugar mixture into the bowl with the eggs while whisking vigorously.
- Cook: Slowly stream the tempered eggs into the saucepan with the remaining lemon-sugar mixture while whisking vigorously. Place the pan over medium-low heat then whisk continuously until the mixture has thickened, 4-5 minutes.
- Strain: Scrape the lemon curd into the fine mesh sieve over the glass bowl with a spatula then press it through.
- Cool: Add half the cold butter then stir until melted. Add the remaining butter then stir until melted. Add the vanilla extract then stir until combined. Place a piece of saran wrap directly on top of the lemon curd then refrigerate until completely chilled before using, 2-3 hours.
- Store: Lemon Curd can be refrigerated for up to 2 weeks, or frozen for up to 3 months.
Notes
The Science of Silky Lemon Curd
The magic of lemon curd lies in creating a stable emulsion between the acidic lemon juice and the fatty egg yolks, thickened by the proteins in the eggs as they gently cook. This recipe relies on careful heat control to achieve a luscious, smooth texture without scrambling the eggs. The process involves slowly raising the temperature of the egg, sugar, lemon juice, and salt mixture. The sugar not only sweetens but also helps to denature the egg proteins, allowing them to thicken more effectively and preventing a rubbery texture. The salt enhances the overall flavor profile, balancing the tartness of the lemon. Crucially, the curd is cooked over a double boiler (or a heatproof bowl set over simmering water) to ensure gentle, indirect heat. This prevents the eggs from cooking too quickly and forming undesirable lumps. Stirring constantly is vital to distribute heat evenly and keep the mixture from scorching on the bottom. Once thickened to a custard-like consistency, the cold butter is whisked in off the heat. The butter emulsifies into the hot curd, adding richness, a glossy sheen, and contributing to the smooth mouthfeel. The vanilla extract is added last to preserve its delicate aroma.
Troubleshooting
- Problem: Curd is lumpy or scrambled.
Fix: This happens when the eggs cook too quickly. To fix, immediately strain the curd through a fine-mesh sieve to remove any cooked egg bits. For future batches, always use a double boiler or very low heat and stir constantly. - Problem: Curd is too thin.
Fix: The curd may not have been cooked long enough or the heat was too low. Return the strained curd to the double boiler over low heat and cook, stirring constantly, until it coats the back of a spoon (about 170-175°F or 77-79°C). Be patient, as it can take time. - Problem: Curd tastes too eggy.
Fix: Ensure you used fresh eggs and didn’t overcook the curd, which can concentrate the eggy flavor. Adding a touch more lemon juice or a pinch of salt can help balance the flavor. Using high-quality vanilla extract also helps mask any eggy notes. - Problem: Curd has a slightly grainy texture.
Fix: This can occur if the sugar didn’t fully dissolve or if the eggs slightly overcooked. Straining the curd through a fine-mesh sieve is the best immediate fix. For prevention, ensure the sugar is fully dissolved into the egg mixture before applying heat.
Substitutions
- Lime Juice for Lemon Juice: Use an equal amount of fresh lime juice for a vibrant lime curd. The flavor will be distinctly citrusy but less intensely tart than lemon.
- Orange Juice for Lemon Juice: Substitute with fresh orange juice for a sweeter, less tart curd. You may need to adjust sugar slightly depending on the sweetness of the oranges.
- Heavy Cream instead of Butter: Whisk in 2-3 tablespoons of heavy cream along with the butter (or instead of butter, if necessary) at the end for an even richer, smoother texture. This adds fat and helps emulsify.
- Maple Syrup for Sugar: Replace granulated sugar with an equal amount of maple syrup. Note that this will impart a maple flavor and may slightly alter the color and texture of the curd. Reduce liquid slightly elsewhere if needed.
Pro tips
- Use fresh, organic lemons for the best flavor; bottled juice won’t give the same zest.
- Tempering the eggs is crucial: slowly drizzle the hot liquid into the whisked eggs while constantly stirring to prevent them from cooking too quickly.
- Cook the curd over medium-low heat and whisk continuously until it visibly thickens. If it starts to boil or look grainy, remove it from the heat immediately and whisk vigorously.
- For food safety, ensure the lemon curd reaches an internal temperature of 170°F (77°C) to fully cook the eggs, but do not boil it.
- Store leftover lemon curd in an airtight container in the refrigerator for up to 2 weeks, or freeze for up to 3 months. Thaw in the fridge overnight.
This homemade lemon curd is a game-changer for your culinary creations. Give it a try and enjoy the bright, zesty magic it brings to your table!
Frequently asked questions
Why do I need to use a double boiler for lemon curd?
A double boiler provides gentle, indirect heat, which is essential for cooking the eggs without scrambling them. Direct heat from a stovetop can cause the eggs to cook too quickly, resulting in a lumpy or broken curd.
How do I know when my lemon curd is thick enough?
The curd is ready when it’s thick enough to coat the back of a spoon. When you run your finger through the coated spoon, the line should hold its shape without immediately filling in. Aim for a temperature around 170-175°F (77-79°C).
Can I make lemon curd without eggs?
Traditional lemon curd relies on eggs for thickening and richness. While vegan versions exist using cornstarch or agar-agar, they will have a different texture and flavor profile compared to this classic recipe.
How long will homemade lemon curd last in the refrigerator?
Properly stored homemade lemon curd in an airtight container in the refrigerator should last for about 1 to 2 weeks. Ensure it’s cooled completely before sealing and refrigerating.
More from Gluten-Free Desserts & Sweets →