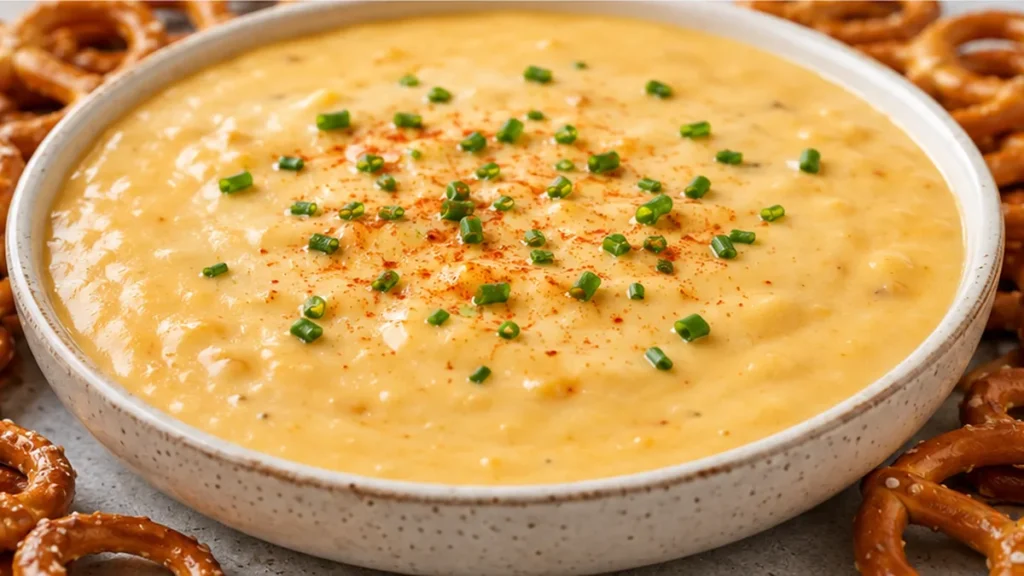
Gluten-free beer cheese achieves an incredibly smooth texture by carefully building a roux and melting the cheese slowly over low heat. This gluten-free beer cheese recipe ensures a velvety consistency without any grittiness, perfect for those with dietary restrictions or anyone seeking a delicious dip. This recipe is specifically crafted to deliver robust flavor and a perfect consistency, making it an ideal appetizer or snack. Rushing the cheese-melting process gives beer cheese a slightly grainy texture; patience here is key.
Key takeaways
- Using a proper roux is essential for a smooth texture.
- Choosing the right cheese enhances flavor and creaminess.
- Controlling heat prevents cheese separation and maintains emulsion.
- Adjusting seasonings can elevate the overall taste of the dip.

Gluten-Free Beer Cheese Dip
Ingredients
- 2 tbsp butter
- 2 tbsp gluten-free all-purpose flour
- ¾ cup gluten-free beer
- ½ cup whole milk
- 2 cups shredded sharp cheddar cheese
- ½ cup shredded Gruyere or Swiss cheese
- ½ tsp garlic powder
- ½ tsp onion powder
- ½ tsp Dijon mustard
- ⅛ tsp cayenne pepper
Instructions
- In a medium saucepan over medium heat, melt the butter. Whisk in the gluten-free flour and cook for 1 minute, stirring constantly.
- Slowly whisk in the beer and milk until smooth.
- Stir in garlic powder, onion powder, Dijon mustard, cayenne pepper, and salt. Cook, stirring frequently, until the mixture thickens slightly, about 3–5 minutes.
- Reduce the heat to low and add the cheddar cheese in handfuls, stirring until fully melted before adding more cheese.
- Serve warm immediately with gluten-free crackers, bread, pretzels, vegetables, or sliced potatoes.
Video
Notes
Understanding the Importance of Roux in Gluten-Free Beer Cheese
The foundation of this gluten-free beer cheese dip begins with a roux, which is a mixture of fat and flour used to thicken sauces. In this recipe, you will melt 2 tablespoons of butter and whisk in 2 tablespoons of gluten-free all-purpose flour. This mixture should be cooked for about 1-2 minutes over medium heat until it forms a paste and loses its raw flour taste. This step is crucial for achieving a smooth and creamy texture without lumps.
Why Cheese Selection Matters for Texture and Flavor
The choice of cheese significantly impacts the final flavor and texture of your dip. Using 2 cups of shredded sharp cheddar cheese alongside ½ cup of Gruyere or Swiss cheese provides a balance of sharpness and creaminess. Sharp cheddar offers a robust flavor, while Gruyere adds nuttiness and depth. Ensure the cheese is freshly shredded for optimal melting properties; pre-shredded cheese often contains anti-caking agents that can affect the smoothness of your dip.
Controlling Heat for Perfect Emulsion
Maintaining the right temperature is key to creating a stable emulsion in your dip. Once you add the gluten-free beer and whole milk to the roux, keep the heat at medium to medium-low. Bringing the mixture to a simmer allows it to thicken without boiling, which can cause the cheese to separate. Stir continuously until the mixture is smooth and thickened, which should take about 5-7 minutes. The ideal temperature for melting cheese is around 160°F (71°C), so monitor closely to avoid overheating.
Common Issues and Their Solutions
- Problem: Dip is too thick.
- Fix: Gradually whisk in additional gluten-free beer or milk until the desired consistency is reached.
- Problem: Cheese is clumpy or grainy.
- Fix: Ensure you are using freshly shredded cheese and add it gradually while stirring to maintain a smooth texture.
- Problem: Dip lacks flavor.
- Fix: Adjust seasoning by adding more garlic powder, onion powder, or cayenne pepper to enhance the flavor profile.
- Problem: Dip is too salty.
- Fix: Use unsalted butter and adjust the amount of cheese or additional seasonings accordingly.
Ingredient Swaps and Their Effects
- Gluten-free beer: Substitute with gluten-free broth for a non-alcoholic version, but it will lack the beer’s depth of flavor.
- Whole milk: Use heavy cream for a richer dip, but be mindful of the increased fat content.
- Sharp cheddar: Swap for mild cheddar for a less intense flavor, which may result in a creamier dip.
- Gruyere cheese: Replace with mozzarella for a milder taste, though it will reduce the nutty complexity of the dip.
How to Properly Store Leftover Gluten-Free Beer Cheese Dip
Storing gluten-free beer cheese dip requires attention to maintain its creamy texture and flavor. After cooling, transfer the dip to an airtight container. It can be refrigerated for up to 3-4 days. When reheating, do so gently over low heat to prevent separation. Adding a splash of milk can help restore its original consistency. Avoid freezing, as the cheese can become grainy upon thawing.
Scaling the Recipe for Gatherings
This recipe is easily scalable, making it perfect for gatherings. To double the recipe, maintain the same ratios of ingredients. For every 2 tablespoons of butter, use 2 tablespoons of gluten-free flour, and adjust the liquid ingredients accordingly. Keep in mind that larger batches may require a longer cooking time to achieve the desired thickness. Always taste and adjust seasoning as needed, especially with increased volume.
Choosing the Right Equipment for Smooth Results
The equipment used can significantly affect the texture of gluten-free beer cheese dip. A heavy-bottomed saucepan is ideal for even heat distribution, preventing scorching. A whisk is essential for ensuring a smooth roux and incorporating cheese without lumps. If available, an immersion blender can be used after cooking to achieve an ultra-smooth consistency. Avoid using non-stick pans, as they can create uneven heat and affect the dip’s texture.
Seasonal Ingredient Impact on Flavor
The quality of ingredients, especially cheese and beer, can greatly influence the final flavor of gluten-free beer cheese dip. In the summer, opt for lighter, crisper beers, which can provide a refreshing taste. In contrast, richer, maltier beers are better suited for winter gatherings. Freshly grated cheese melts better and offers superior flavor compared to pre-packaged shredded cheese. Always choose high-quality ingredients for the best results.
How to Prepare Gluten-Free Beer Cheese Dip in Advance
Making gluten-free beer cheese dip ahead of time can save you valuable prep time during gatherings. To prepare in advance, follow the initial steps of the recipe until the cheese is fully melted and combined. Once the dip reaches the desired consistency, allow it to cool slightly before transferring it to an airtight container. Refrigerate for up to three days. When ready to serve, reheat gently on the stovetop over low heat, stirring frequently to maintain a smooth texture. If the dip thickens too much, add a splash of additional gluten-free beer or milk to adjust the consistency.
Scaling Up: How to Make a Larger Batch of Beer Cheese Dip
Scaling this gluten-free beer cheese dip recipe for larger gatherings requires careful attention to ingredient ratios and cooking time. When doubling the recipe, maintain the same proportions of ingredients. However, be mindful that cooking times may vary; a larger batch may take longer to heat through. Use a larger pot to ensure even heating and avoid scorching. Additionally, consider the size of your serving vessel, as a larger quantity may require a slow cooker or chafing dish to keep the dip warm during serving.
Choosing the Right Pairings for Your Beer Cheese Dip
The flavor profile of gluten-free beer cheese dip can be complemented by various dippers and accompaniments. Traditional pairings include gluten-free pretzels, fresh vegetable sticks, or tortilla chips. For a more gourmet experience, consider serving with artisan gluten-free bread or crackers. The bitterness of the beer can be balanced with sweeter dippers like apple slices or roasted vegetables. Furthermore, seasonal ingredients, such as fresh herbs in spring or roasted garlic in fall, can elevate the dip’s flavor profile, enhancing the overall tasting experience.
Understanding the Impact of Cheese Quality on Flavor and Texture
The selection of cheese is crucial in achieving the desired flavor and texture in gluten-free beer cheese dip. Sharp cheddar provides a robust taste, while Gruyere or Swiss contributes creaminess and a nutty undertone. When using lower-quality cheeses, the dip can become grainy or lack depth. For optimal results, choose aged cheeses with a higher fat content, as they melt more smoothly and create a luxurious mouthfeel. Aim for a cheese blend that is at least 70% fat for the best texture. The balance of flavors can be adjusted by varying the ratios of cheddar to Gruyere, but keep in mind that too much Gruyere may overshadow the sharpness of the cheddar.
Adapting the Recipe for Seasonal Ingredients and Freshness
Seasonal ingredients can significantly influence the flavor profile of gluten-free beer cheese dip. For instance, using fresh herbs like chives or parsley during spring can add a vibrant freshness. In fall, consider incorporating roasted garlic or caramelized onions for a deeper, sweeter flavor. When using seasonal ingredients, adjust the seasoning accordingly; fresh herbs often require less salt compared to dried ones. Always prioritize fresh, high-quality ingredients to enhance the dip. If using different types of gluten-free beer, expect variations in flavor intensity and bitterness, which will affect the overall taste of the dip. For optimal results, taste and adjust seasoning as you go.
Understanding the Impact of Beer Type on Flavor
The choice of gluten-free beer significantly influences the overall flavor profile of your beer cheese dip. Different beers carry unique characteristics—such as bitterness, sweetness, and aroma—that can alter the final taste. For instance, a pale ale offers a hoppy bitterness that can complement the sharpness of cheddar, while a stout can add a rich, roasted flavor. When selecting your gluten-free beer, aim for a variety that balances the cheese’s creaminess. A good ratio to consider is 1 part beer to 1.5 parts cheese, ensuring the dip remains creamy yet flavorful. Additionally, consider the alcohol content; beers with higher alcohol content may require slight adjustments in other liquids to maintain the desired consistency.
Why Cheese Melting Point Matters for Texture
The melting properties of cheese are crucial for achieving the perfect smooth and creamy beer cheese dip. Different cheeses melt at varying temperatures, affecting the texture of your dip. Sharp cheddar, for example, melts well but can become grainy if overheated. To prevent this, maintain a low to medium heat during preparation and avoid boiling. Gruyere or Swiss cheese can enhance creaminess when combined with cheddar, but they require careful monitoring to ensure they melt evenly. The ideal temperature for melting cheese is around 150°F (65°C). Using a food thermometer can help achieve this, ensuring a smooth emulsion without separation. If you notice a grainy texture, the likely cause is overheating; simply lower the heat and whisk vigorously to re-emulsify.
Pro tips
- For the smoothest sauce, ensure the cheese is at room temperature before adding it to the saucepan. This helps it melt more evenly.
- Don’t let the sauce boil once the cheese is added, as this can cause the cheese to separate and become oily.
- If the dip becomes too thick upon cooling, gently reheat it over low heat, whisking in a tablespoon or two of milk until it reaches your desired consistency.
- Store any leftover beer cheese in an airtight container in the refrigerator for up to 3-4 days. Reheat gently on the stovetop or in the microwave.
This gluten-free beer cheese is a delightful and versatile dip that’s worth making. Experiment with different gluten-free beers to find your favorite flavor profile. Enjoy!
Frequently asked questions
Can I make this dip ahead of time?
Yes, you can prepare the dip ahead of time. Store it in an airtight container in the refrigerator for up to three days. Reheat gently on the stove, adding a splash of milk or beer to restore its creaminess.
Is there a vegan version of this gluten-free beer cheese dip?
Yes, you can create a vegan version by using plant-based butter, gluten-free flour, non-dairy milk, and vegan cheese alternatives. Ensure that the beer is also vegan-friendly.
What type of gluten-free beer is best for this recipe?
Look for a gluten-free beer that is well-balanced and not overly hoppy. A lager or a pale ale typically works best, providing a nice flavor without overpowering the cheese.
Can I freeze the gluten-free beer cheese dip?
While it’s possible to freeze the dip, the texture may change upon thawing. If you choose to freeze it, reheat slowly and stir well to restore creaminess.
More from Gluten-Free Snacks & Sides →